- Home
- Restoration Articles
- Replace your old water heater; fear not!
Replace your old water heater; fear not!
- By D Bishop
- Published 12/29/2008
- Restoration Articles
 D Bishop

Retired, Robotics Engineeer, Real Estate Broker, Rancher, Lumber Dealer, Master Electrician, Pilot, and a few other odd and sundry ventures.
View all articles by D Bishop
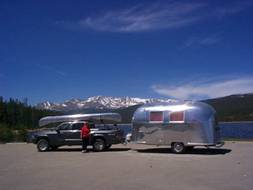
My wife and I own a mostly original 1965 Caravel and on our last camping trip of the summer, while shutting down all systems and preparing to return home, my wife noticed smoke coming from the water heater compartment (not good).
I quickly turned off the gas at the tank then took the cover of the heater. Sure enough while shutting off the control valve I had not made sure the knob was seated properly and a gas leak had ignited from the still burning pilot which melted the control knob. The 1965 Caravel original heater had finally expired.
Being the Mr. Fixit that I am, I checked it all out and decided the melted knob was the only problem, WRONG!! But again me being me I decided to try and find a replacement knob. Other, wiser, owners said I had received more than life expectancy from the heater and I should replace it.
It looked like a really big job so I spent the better part of a month trying to find a replacement knob. Then in one of my saner moments, coming as a flash in the middle of the night, I thought, I really don’t want to try to fight a fire in the middle of the night in a National Forest Campground to save my 44 year old treasure. So I followed the wiser, owner’s advice and ordered a new heater. (Good Choice). Now the fun part and the reason for the "Fear Not" statement above.
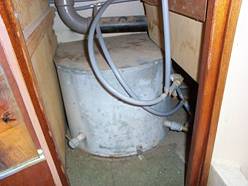
A few days later I received the new heater at a very nominal cost via UPS from Vintage Trailer Supply. I really thought getting the old one out was going to be the biggest hassle. Again I was WRONG! It took less than an hour to remove the old one. All that was required was disconnecting the piping, unscrew the exterior cover ring and slipping the old heater out.
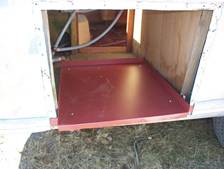
Some of the wiser owners had advised that a drip pan under the new heater would be a good idea. I happen to own a metal break so I fabricated the pan and installed it as shown above.
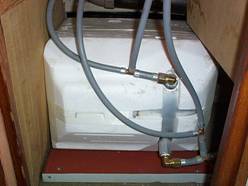
Next came installation of the new heater. It took about 3 hours to place, reinstall the water pipe, gas pipe, soap the joints and pressure test with air. Voila! Five hours later we have a safe, new heater and still have our wonderful 1965 Airstream Caravel ready for another season.
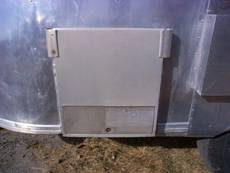
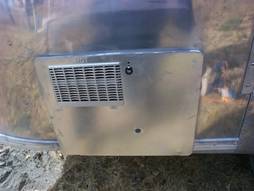
The replacement fit perfectly and all I had to do was caulk around the edge and install new screws in the exterior ring and put the cover on. The cover was cream color so I used a good grade of Chrome paint over the cover and it looks like it was factory installed.
Our first trip of the season is planned for the last week of February and the first week of March to Elephant Butte Lake, New Mexico. I am a native of New Mexico and have wanted to take this trip for many years. I will let you know if it is as much fun as I think it is going to be.
Don't be afraid to take on this project, it is easy and well worth the time and money.
WBCCI # 2240 Don & Phyllis
 |
 |
 |
 |
 |
 |
I quickly turned off the gas at the tank then took the cover of the heater. Sure enough while shutting off the control valve I had not made sure the knob was seated properly and a gas leak had ignited from the still burning pilot which melted the control knob. The 1965 Caravel original heater had finally expired.
Being the Mr. Fixit that I am, I checked it all out and decided the melted knob was the only problem, WRONG!! But again me being me I decided to try and find a replacement knob. Other, wiser, owners said I had received more than life expectancy from the heater and I should replace it.
It looked like a really big job so I spent the better part of a month trying to find a replacement knob. Then in one of my saner moments, coming as a flash in the middle of the night, I thought, I really don’t want to try to fight a fire in the middle of the night in a National Forest Campground to save my 44 year old treasure. So I followed the wiser, owner’s advice and ordered a new heater. (Good Choice). Now the fun part and the reason for the "Fear Not" statement above.
A few days later I received the new heater at a very nominal cost via UPS from Vintage Trailer Supply. I really thought getting the old one out was going to be the biggest hassle. Again I was WRONG! It took less than an hour to remove the old one. All that was required was disconnecting the piping, unscrew the exterior cover ring and slipping the old heater out.
Some of the wiser owners had advised that a drip pan under the new heater would be a good idea. I happen to own a metal break so I fabricated the pan and installed it as shown above.
Next came installation of the new heater. It took about 3 hours to place, reinstall the water pipe, gas pipe, soap the joints and pressure test with air. Voila! Five hours later we have a safe, new heater and still have our wonderful 1965 Airstream Caravel ready for another season.
The replacement fit perfectly and all I had to do was caulk around the edge and install new screws in the exterior ring and put the cover on. The cover was cream color so I used a good grade of Chrome paint over the cover and it looks like it was factory installed.
Our first trip of the season is planned for the last week of February and the first week of March to Elephant Butte Lake, New Mexico. I am a native of New Mexico and have wanted to take this trip for many years. I will let you know if it is as much fun as I think it is going to be.
Don't be afraid to take on this project, it is easy and well worth the time and money.
WBCCI # 2240 Don & Phyllis
