- Home
- Restoration Articles
- Reefer Madness
Reefer Madness
- By Michael Depraida
- Published 10/19/2009
- Restoration Articles
 Michael Depraida


Hi, my name is Michael (aka) ArtStream. I'm a full time artist and traveler. I do most all my own repairs and maintenance on my 1995, 28' Excella and 1998 E350 T.D. box truck, which acts as my rolling garage. I have been living and working on the road since 2000 and am completely solar supported.
View all articles by Michael DepraidaReplace the coil in your refrigerator!
Words and pictures by Michael J. Depraida
(AKA) ArtStream
Coil replacement is simple. If you considered replacing the box yourself, coil replacement only adds about 3 hours to the installation process. There are no special tools required no welding or solder connections to make; the cooling unit simply bolts to the back of the refrigerator box. Most people with average mechanical ability and a basic set of hand tools can change the cooling unit on their refrigerator in a few hours.
Costs 50% less than a complete replacement box. Plus it gives you an opportunity to clean up and seal the poorly designed refrigerator housing cabinet and maybe even install a nifty cooling fan
| Getting Started: I started by going in line and ordering a replacement coil from one of the many replacement rebuilders, I chose RV Ice Box. I ordered on-line. The unit arrived quickly and was well packed. The shipping box is big, and can be handled by one burly person. I’m not burly, so I recommend two people. After unpacking, I noticed a small dent on one of the coils, so I snapped a photo and sent it along with an e-mail to the contact person at RV ice box. In less than 2 hours, I had a e-mail response apologizing for the shipping damage and a new unit was sent out the next day. By the way, hold on to that shipping box as it is required to return the old coil. Return shipping is pre paid; you just call the FedX for pick-up. | 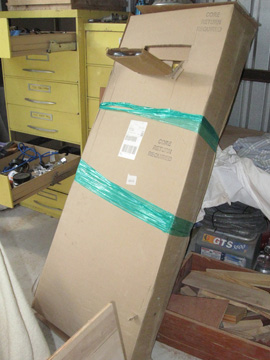 |
| 1) Let’s start by turning off the gas at the tanks, and disconnecting the batteries. 2) Disconnect the 12 volt wires to the control board and pull the 120v power cord. (procedure varies depending on model) |  |
| 4) Remove mounting bolts. (Location vary with model). | 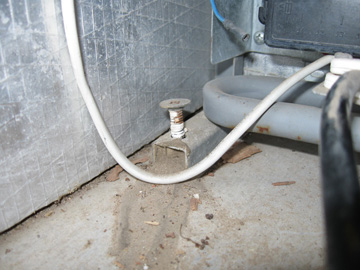 |
| Next on to the front of the unit.
| 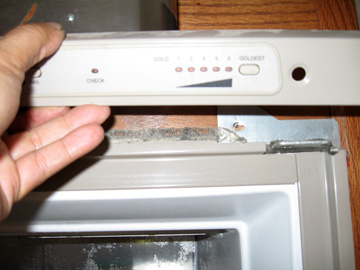 |
Once the refrigerator has been disconnected from its frame, and the door/doors have been removed, it’s time to call a friend. A full size refrigerator is not an agile dance partner. Removing the box from inside requires two persons, I’m not burly, remember. I placed heavy mats and rugs on the floor just in front of the box. My friend Paul, pushed from the outside just enough to allow a grip of the box from the inside, about 12”. Than Paul and I both wiggled the box out from the inside of the trailer and lowered it down to the waiting mats. We then dragged the box using the mats to the trailer door and slid it out to a waiting hand truck. |
| Now comes the easy part. Once the box has been removed from the trailer, it is a simple remove and reverse process. The instructions which came with my replacement unit were excellent. All electronics, gas and electrical parts are salvaged from the back of the box. | 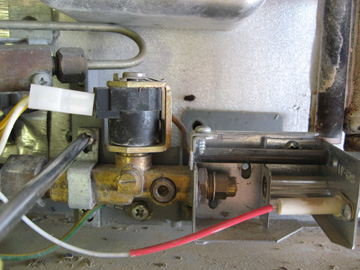 |
| I like to snap lots of pictures for reference | 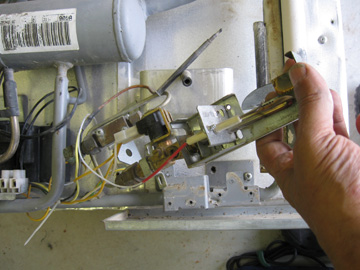 |
| Now all that should be left attached to the back of the box are the cooling coils. This is what the bare cooling unit looks like from the back. | 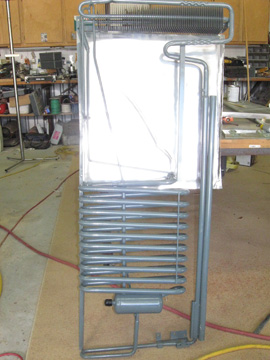 |
| The cooling unit is removed by unscrewing a few screws and cutting around the foam insulation, than prying the unit from the box. | 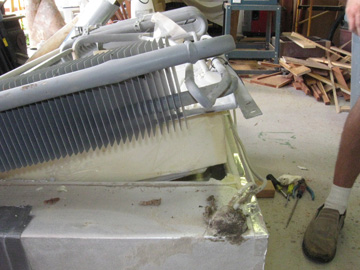 |
 | |
| Here, the old unit has been removed from the box and I’m salvaging the cooling fins for instillation on the new unit. | 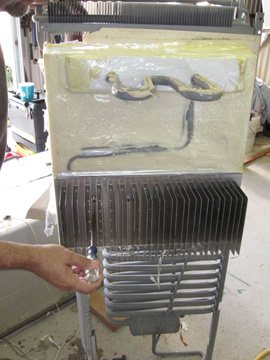 |
| New coils on Left, old coils on right. | 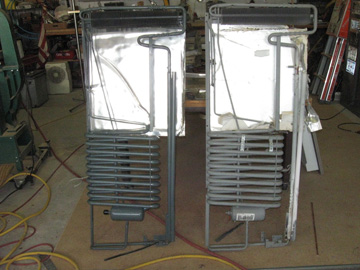 |
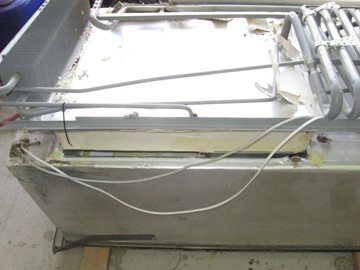
| After removal of the coils, this is what the back of the refrigerator box looks like. | 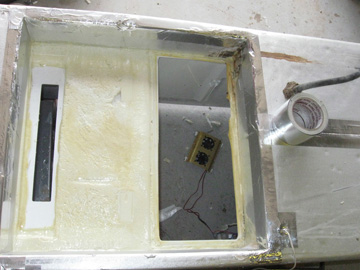 |
| First, the old cooling fins are reattached to the new cooling unit using “thermal mastic” (supplied) as is the freezer cooling plate | 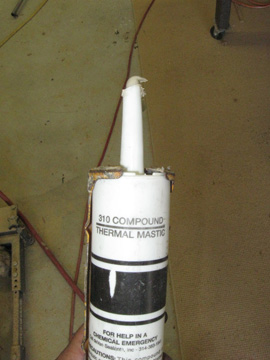 |
Mastic is also applied to the freezer plate. | 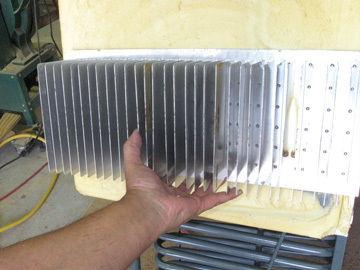 |
| Now the
new cooling unit can be fitted into the back of the box. I also purchased some thin aluminum tape and sealed all the seams. | 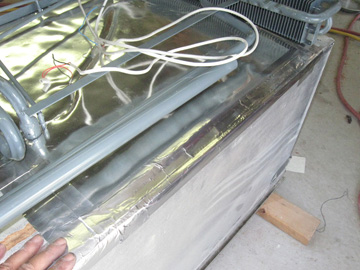 |
| Now it’s simply a reverse procedure. |  |
| Don’t forget to remove the old damper from the flue and install it in the new flue. (if applicable) | 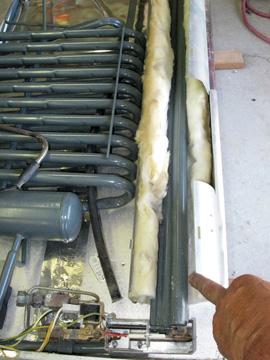 |
| Once everything is put back together, it’s wise to try the unit overnight on 12 volt power before installing it back into the trailer. | 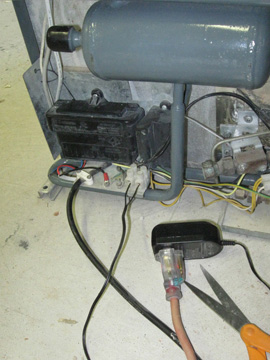 |
Here is the finished coil install. It took just 24 hours to remove, test and install the new cooling unit back into the trailer. Would I do it again, yes! Would I recommend the procedure to a friend, you bet Prologue: 5 months latter and the unit is cooling great | 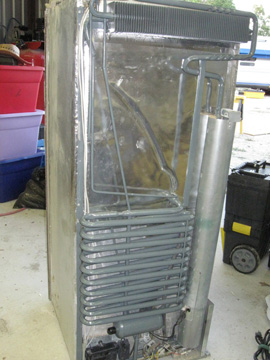 |
WARNING NOTICE: Models
vary. This article is just enough for you to decide if cooling unit replacement
is right for you. Side affect include: Rock hard Ice cream, frosty beer and
milk that makes it to expiration. If your Ice cream remains hard for longer than
4 hours, please consult your refrigerators owners’ manual.
Michael J.
Depraida is a full time artist and has been living and working on the road
since 2000 in his solar dependent 28’ classic, and 1 ton 15’ diesel box truck. Workshop courtesy AirForums members Paul Mayeux and Ann Flanagan |